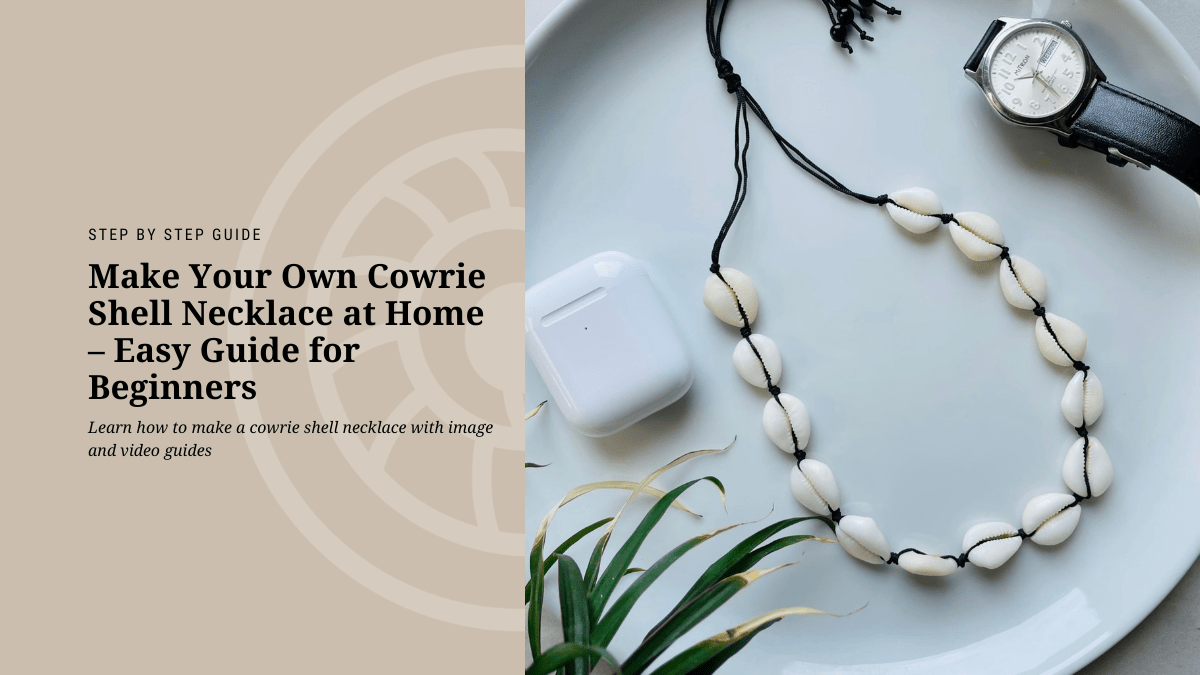
Cowrie Shell Necklace, Where to start?
Hello guys, I am Menu, actually, it is for Menaka, which is my real name and let us talk about making a Cowrie Shell Necklace at home.
If you are a little confused about where to start, let me show you an easy path.
The first thing that you need to decide is what the purpose of making a Cowrie Shell Necklace at home is.
I will break it down into 3 parts to understand easily:
01. Make necklace for yourself
Making a necklace for yourself is a self-satisfying activity that makes you happy with the end result. You do not need to stress out about the process as you are making it for yourself. Also, the preparation for this is not as hard as making it for a gift or for business. The quality and the time depend on you, so take it easy and follow the instructions.
02. Make it as a gift or for someone else
It’s a little different than above when it comes to making seashell jewelry as a gift or for someone else. You need to make it on time and consider the quality. Also, think about the packing to offer it as a gift. While it’s a little harder than making it for yourself, it is still easy just follow the guide.
03. Make Seashell jewelry for business
Making seashell jewelry for a business is a little tricky process as we need to think about several things before starting. I’ll share some of the facts that you should consider if you are planning to start a home business selling seashell jewelry products.
Materials – You will have to find cowrie shells and maintain a stock, which may depend on the orders that you have. We maintain around 5KG -10KG of cowrie shell stock per month to deliver around 200 – 400 finished items.
Also, you need cotton threads, beads, pearls, chains, jump rings, clasps, eye pins, etc.
Tools – When you make a production, you will need tools like drilling machines, sandpapers, wire cutters, jewelry pliers, and safety items like safety spectacles, face masks, a table, or a working desk.
Production – To have a consistent production process, you will need to have all the required materials.
Time – You have to manage your time if you are planning to do this as a part-time business. From buying materials to delivering the products, it’s a bit of a long process that needs consistency.
Audience – The audience is the group of people that you are targeting to sell the seashell jewelry to. It is better to have an idea of your target audience to design and market your items.
Marketing methods – There are several marketing methods for selling these types of items. We sell our items online, so we have experience with online business. It is good to have an idea from a marketing perspective before starting a business.
Delivery plan – Make sure to have a plan, as delivering is also a major part of the business if you are planning to sell online.
So determining the way that you start is up to you. Consider the facts above. In this guide, you will find guidance for all three paths. Make sure to grab the things that suit your purpose, as I am sharing guidance that covers everything from making a cowrie shell necklace to selling it.
My experience is a different story. My husband Dilip is a surfing enthusiast. And I am the surfing partner, not for surfing, but for holding the surfboard on the bike from home to the beach. Once he gets into the sea, I have around two hours of free time and what I love to do is walk on the beach and collect seashells.
Somehow I got an idea to make cowrie shell jewelry and I found resources on Google and YouTube. To make jewelry using cowrie shells, the shell’s top layer needs to be removed. Luckily, I found cowrie shells that naturally had the top removed on the beach. And one requirement was completed. Then I needed threads and the practice to develop the skill.
I bought some threads from a local store and tied different types of knots to tighten the cowrie shells and finally built a beautiful and satisfying cowrie shell necklace. Remember, I didn’t have any kind of business idea up to now. All I wanted was to try this new thing with my hands, and that’s all.
Now let’s make a cowrie shell necklace at home
Before we begin, let me break down the process into a few steps. Then I will explain one by one, and all you need to do is follow the guide correctly.
1. Finding cowrie shells
Finding a good and enough collection of cowrie shells is a bit challenging, especially if you are planning to do a business. But if it’s just for yourself, it’s not that difficult.
We are living in a coastal area that is only 3 kilometers from our home. So finding seashells on our own is easy.
Also, because of the coastal area, we can find local sellers and buy, and it’s easier than picking seashells on a beach for hours even though it is a stress-relieving activity.
On the other hand, we can find online sellers on Amazon, AliExpress, or any other e-commerce platform to contact and buy seashells online.
What you need to consider when finding cowrie shells
Natural – Make sure to have natural seashells, as there are many synthetic ones available. I personally prefer natural ones, and customers also prefer seashells to be natural.
Size – Size is also a matter. Larger sizes don’t look good for necklaces. It’s good to have medium and small sizes of cowrie shells not too small, either.
Color – Most people prefer clean white cowrie shells, as it is the most popular color. When cowrie shells get old, the color changes from white to a yellowish tone, which makes them look old. Make sure to skip these shells when selecting good-looking white cowrie shells.
Finding other essential accessories
To make a cowrie shell necklace at home, you need more accessories besides seashells. Let me list them below:
- Cotton threads – Used to tie the cowrie shells and build the necklace. Threads come in different colors and sizes. We recommend using 1mm thread.
- Beads – You can use any type of beads you prefer, in any color. We use wooden, glass, ceramic, and plastic beads with different colors.
- Chains – We use chains in different sizes, colors, and designs. This is also up to you select a chain type you like.
- Jump rings – Used as connectors to connect shells, beads, threads, and other accessories.
- Jewelry clasp – Used to connect or close two ends of necklaces, bracelets, and anklets.
These are the accessories mostly used for making cowrie shell necklaces. Find good-quality ones for a finished look.
How to find accessories?
I use several methods to find accessories.
First method is going to local stores we already know. We have a few local stores that have most of the accessories we need. We buy at wholesale prices because we buy a lot at once, as we need the accessories continuously for production.
Second method is buying from online marketplaces like Amazon, AliExpress, and even Facebook Marketplace.
We use these two methods, and it’s easy to find as they are always available online and in local stores.
Tools
There are tools that you should have on hand to make cowrie shell necklaces, and most of them are must-haves. Let me list them below.
- Mini hand drill – You’ll need one with a 1mm or 2mm drill bit. Some come with extras like sanders, grinding shank, cutters, and sandpaper.
- Jewelry pliers – Important for preparing and finishing the necklace.
- Round nose pliers – Used for bending and tying accessories.
- Thread trimmer – Needed for cutting threads.
- Wire cutters – Needed when using wire threads.
- Safety spectacles – Good to wear while drilling and breaking shells.
- Face mask – Dust comes out when drilling and grinding shells, so it’s better to wear a mask.
2. Preparing cowrie shells
“Preparing” means getting cowrie shells ready after selecting ones in good shape and size.
First, take the shell and drill a hole. See the video and image below for positioning. Use a 2mm drill bit. Wear a face mask and protective spectacles.
Next, remove the top of the shell. To do that, insert a rod into the drilled hole and lift the top. See video below. We use a Round Nose Plier for this.
Now you can see the cowrie shell with the top removed
Next, clean and shape the shell by removing any unnecessary parts left behind.
Then use a grinding shank to smooth and shape the shell nicely.
Remove any stuck sand grains in the shell as shown here.
You will need around 10–15 cowrie shells to make a necklace, but the count may vary depending on the necklace length.
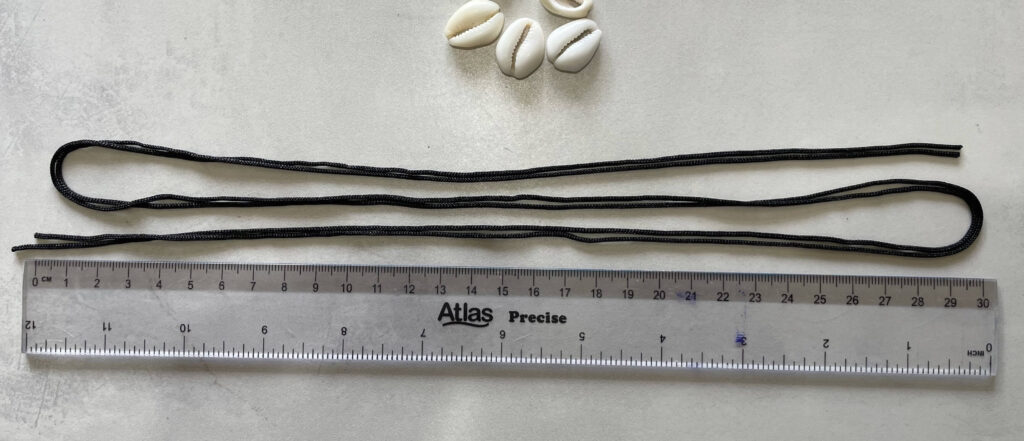
3. Start making the necklace
This is the little tricky part, and most of the steps for tying are shown through short videos below. Watch carefully and don’t skip.
- First, cut the correct thread length. See the image below for an idea. Thread length depends on the person we used the length in the image for an adult.
Next, tie the cowrie shells with the thread. Follow the video tutorial closely to learn the pattern used.
Final step is making the necklace adjustable with a final knot. Follow the tutorial video for this as well.
Alright then, that is all for this tutorial. Hope you found some important details on making a cowrie shell necklace at home. Also see our DIY cowrie shell bracelet at home and Please share this with your friends and show some love ❤️