Cowrie Shell Anklet
May 22, 2025

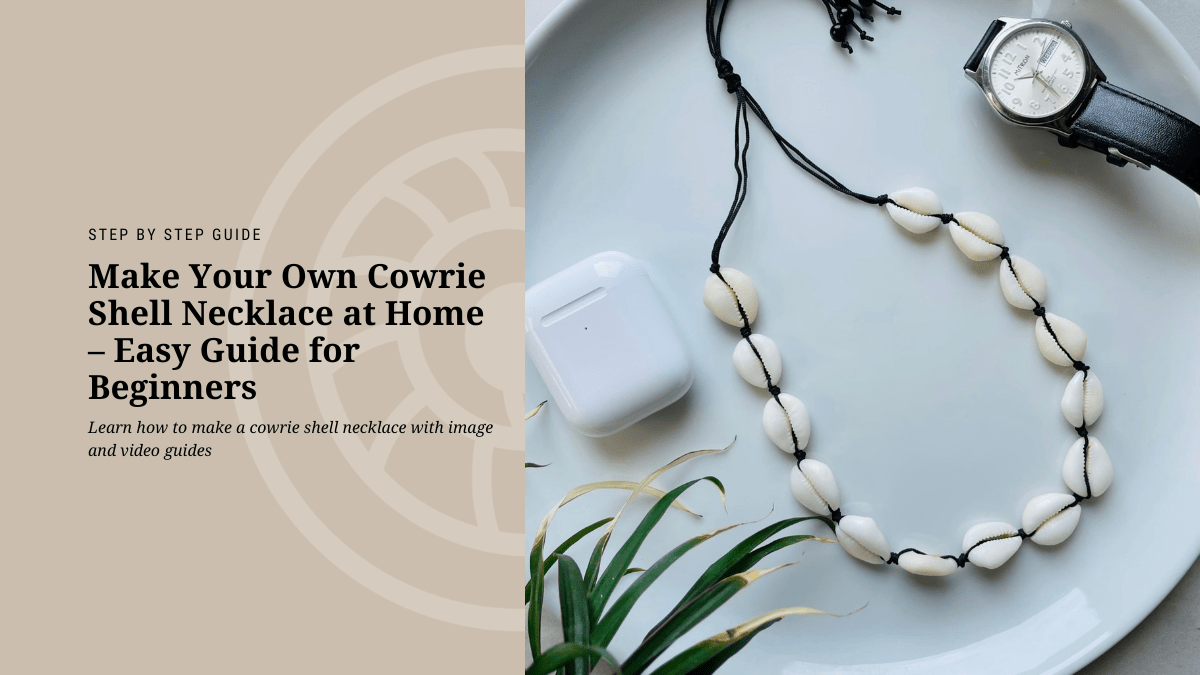
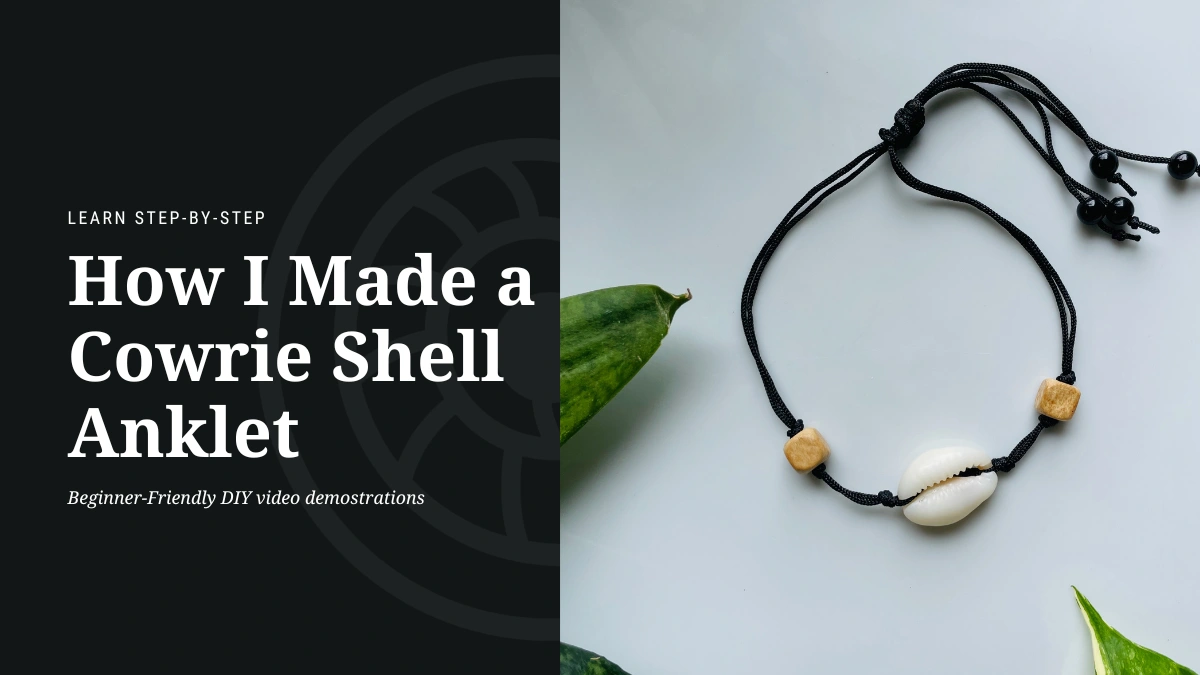
How I Made a Cowrie Shell Anklet

Beginner-Friendly DIY with Step-by-Step Instructions

Hey! It’s Dilip again. After making a cowrie shell necklace and a cowrie shell bracelet, I thought why not try a matching cowrie shell anklet?

I love that beachy, boho vibe, and honestly, there’s something special about feeling a little piece of the ocean around your ankle.

Plus, anklets are easy to make and super cute for barefoot beach days or even casual summer looks.

So here’s a little tutorial of how I made my first cowrie shell anklet from scratch with no fancy tools, just simple steps and a bit of creativity.

What You’ll Need (Your Mini Beach Kit)

Everything I used cost me less than around $5 for this cowrie shell anklet, and I picked most of it up at my local craft store. Here’s the full list,

  • 5 to 9 cowrie shells (depends on your ankle size)
  • Waxed cord, nylon thread, or cotton string (50–60 cm should do)
  • Scissors
  • Lighter or candle (for sealing the ends)
  • Mini hand drill

How I Made It (Step-by-Step)

Step 1 – Remove the Cowrie Shell Tops

Alright, here’s the part where we transform plain shells into polished anklet stars.

You’ll need around 7–9 shells. The first job? Remove the top part of the shell and smooth the edges.

01. Drill the Shell Top Use a 1mm or 2mm drill bit to carefully drill the top of the cowrie shell. You’ll see how I do it in this demo.

02. Lift the Top Off Once the hole is made, grab an iron rod (or anything pointy but safe!) and lift the top gently. It should pop off like this.

03. Remove Extra Bits & Grind Smooth There will be some extra shell bits hanging around. We’ll clean them up using a grinding shank on a mini drill. It makes everything smooth to the touch.

04. Remove Sand Inside the Shells Some shells might still have tiny sand grains inside. I use a small flathead screwdriver to scrape them out.

Dilip’s Reality Check, This step takes patience, but it seriously upgrades the final look. Take your time and enjoy the process!

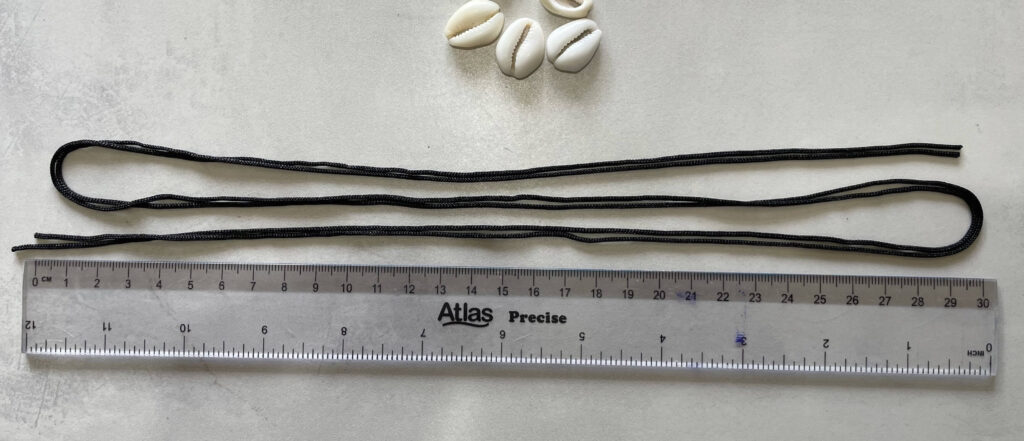
Step 2 – Cut Your Cord

Now let’s prep the string.

I cut about 35–50 cm of cord. Want it to wrap around your cowrie shell ankle more? Go longer.

Then I gently melted the tips with a lighter to stop fraying. Just a little melt, not a flame show.

Also, I made a small knot on one corner of the cord to act as the end stopper.

Step 3 – Add the First Shell (and the Rest)

Time to bring in the shells!

Take your first shell and thread both ends of the cord through the back hole one from each side so the shell lays flat in the middle.

Then keep adding shells the same way. I added some wooden beads for a pop of color too.

I know this step is a bit tricky to explain in words, so I made a video that shows the whole process clearly.

Once you’re done threading all your shells, melt the cord ends slightly to secure everything in place.

Step 4 – Make It Adjustable

Let’s add a sliding knot so it fits just right!

Cut another small cord, about 10 cm long. This part creates the sliding closure that makes your anklet adjustable.

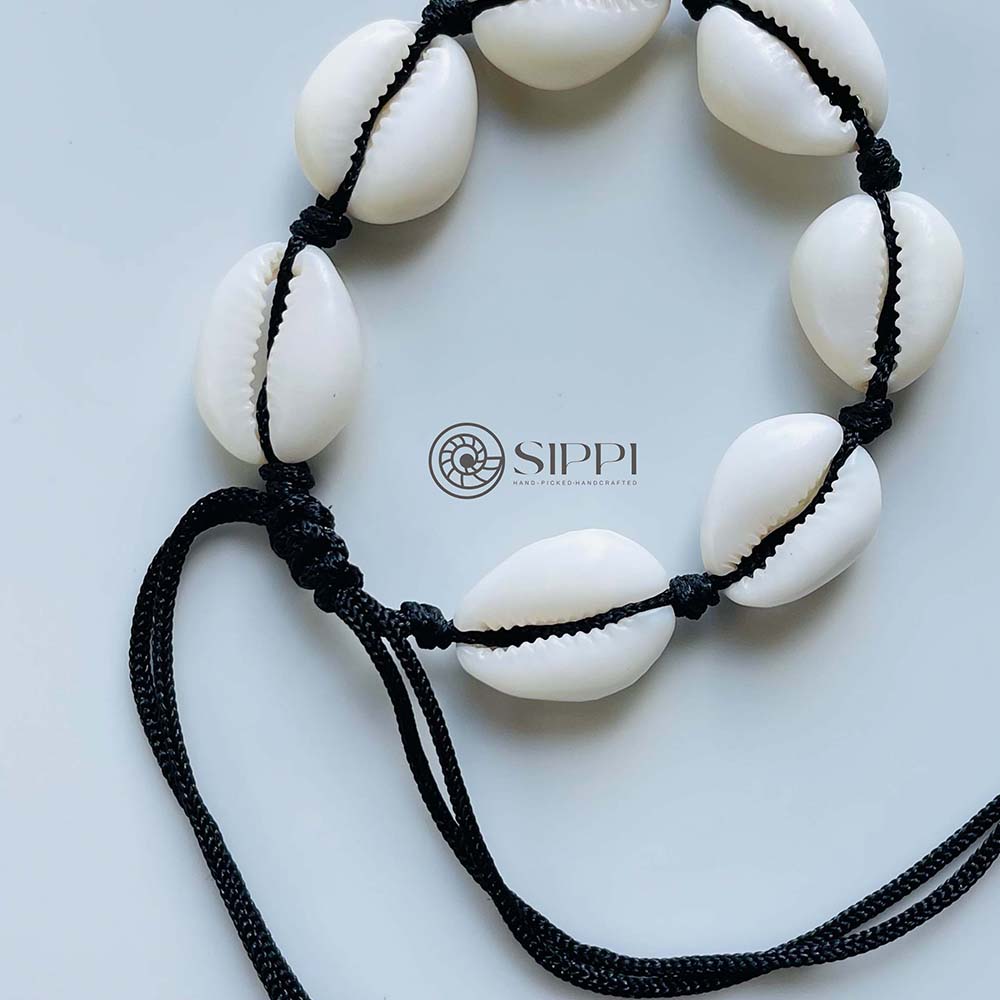
I made a chain of knots around the two anklet cords and melted the ends to lock it in.

Dilip’s Extra Note, The sliding knot makes the anklet feel like real jewelry not just a tied string. It’s easy and looks so good!

Extra Ideas to Make It Yours

If you feel creative (and you totally should), try these,

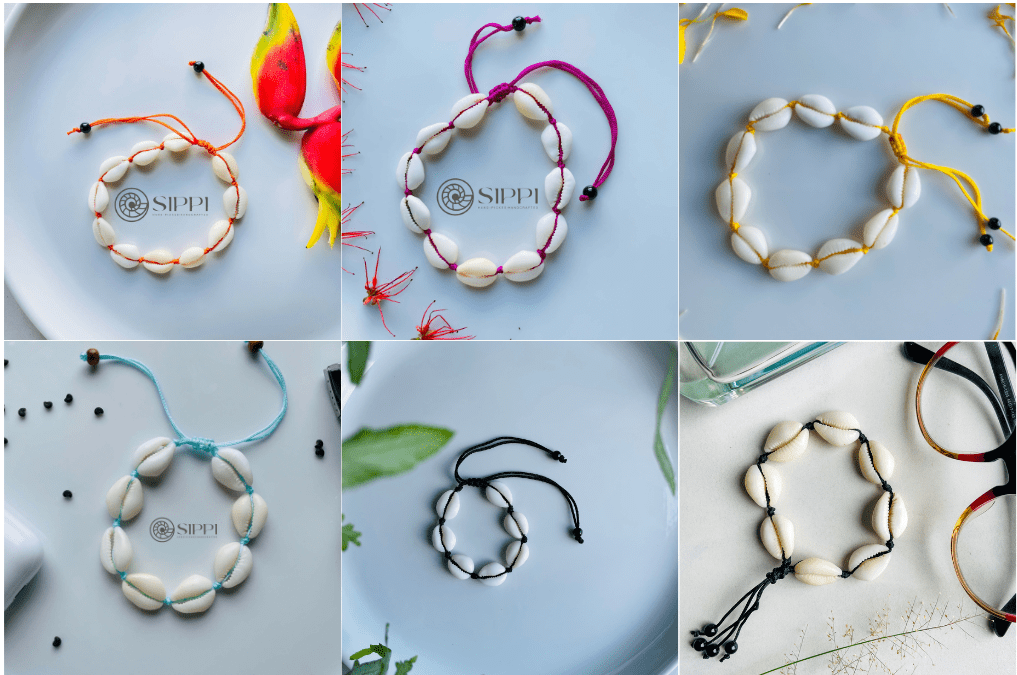
  • Add beads between shells for color
  • Use two or three thread colors braided together
  • Attach a charm like a tiny starfish or dolphin
  • Make a matching bracelet while you’re at it!

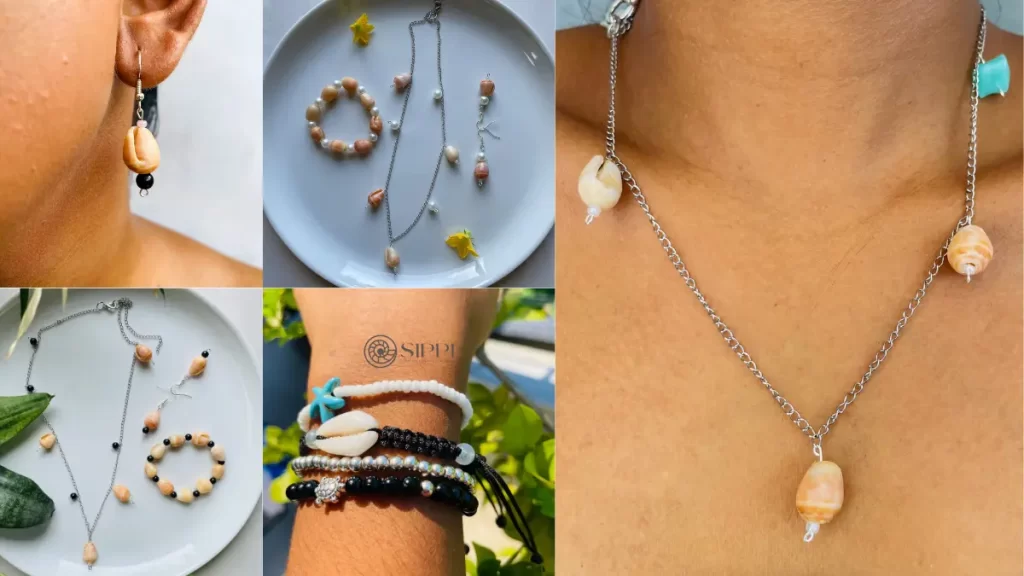
I actually made a full beachy set necklace, anklet, and bracelet. It turned into a whole summer vibe. My cousin even asked me to make her one!

Where to Wear It (and Show It Off!)

  • On a beach trip, barefoot on the sand
  • With sandals, shorts, and an oversized tee
  • As a boho-chic accent with flowy skirts or dresses
  • As a handmade gift for a best friend or sibling

Wanna Sell Your Anklets Too?

Honestly, this could be more than a hobby. I listed mine on Facebook and got a few orders in the first week. Here’s how to make it a mini side hustle,

  • Take nice photos (natural light helps!)
  • Share on Instagram, TikTok, or Etsy
  • Offer custom colors or matching sets
  • Add a cute note in each package
  • Market them as eco-friendly or handmade beach gifts

Cost to make – Around $1–2

Potential price – $8–$15 (or more for sets!)

Final Thoughts from Me

When I started this, I just wanted a cool anklet to match my necklace. But sitting down with some shells and string turned into something so relaxing and satisfying. I made something with my own hands, and you can too.

So, whether you’re making it for yourself, as a gift, or to sell, go for it. Light a candle, get your playlist going, and let your creativity flow.

You’ve got everything you need. And I’m cheering you on from here. Happy crafting, my friend!

Cowrie Shell Jewelry
May 19, 2025

Cowrie Shell Jewelry Benefits – Symbolism, Style & Spiritual Power

Cowrie Shell Jewelry Benefits, Where to begin?

Hello guys, it’s me, Menu. Today, let’s talk about something special cowrie shell jewelry and not just about how it looks but the deeper meanings and benefits behind it.

If you’re wondering why people love wearing cowrie shells, or you’re curious about their background and spiritual power, this article is for you.

I’ll break it down into a few simple parts to make things easier:

  • What cowrie shells really are
  • Their history and meanings in different cultures
  • Why people wear them today for fashion, energy, or spiritual reasons
cowrie jewelry

Let’s dive in

What exactly are cowrie shells?

Cowrie shells come from marine snails and are naturally smooth, shiny, and shaped like an oval with a slit underneath. They feel like tiny polished stones from the sea—and yes, they look amazing in jewelry.

Where do they come from?

Cowrie shells are mostly found in the Indian Ocean and Pacific regions, especially:

  • Around Sri Lanka, the Maldives, and East Africa
  • In Pacific islands like Polynesia and Micronesia
  • Also West Africa, where they were once used as money

Back then, people collected them from the beach, used them in rituals, and even traded them like coins. Isn’t that amazing?

What do cowrie shells symbolize?

This is where it gets interesting. Cowrie shells are more than just pretty shells—they have deep meanings in cultures around the world.

Let me break it down by region

Africa – Power, Protection & Prosperity

In West Africa, cowrie shells were once used as currency, which already gives them a powerful meaning. But they were also believed to:

  • Protect from evil spirits
  • Help with fertility and childbirth
  • Connect with ancestors and spiritual energy

People even stitched them onto clothes and wore them as jewelry to stay safe and bring good fortune.

Pacific Islands – Ocean Spirit & Life Energy

In places like Polynesia, cowrie shells are tied to the ocean’s spirit. Since life comes from the ocean, cowries are seen as a symbol of creation, birth, and life energy.

Some islanders believed cowrie shells had the power to heal and keep people connected with nature and their heritage.

South Asia – Divine Feminine & Good Luck

In Sri Lanka and India, cowrie shells are seen in rituals and sometimes even used in games and fortune-telling.

  • They are connected to the goddess Lakshmi, who represents wealth and beauty
  • People wear them for good luck, especially during special occasions

Why wear cowrie shell jewelry today?

You may ask, “Okay, that’s cool—but why should I wear one?”

Let me share three simple reasons:

  1. For Style

Cowrie shells are timeless. Whether you wear them on a necklace, bracelet, or anklet, they give a beachy, relaxed, and natural look.

They go well with cotton outfits, boho fashion, or even a casual tee and jeans. We use cowrie shells for both men’s and women’s jewelry, so anyone can wear them.

  1. For Symbolism

Each shell you wear has a story. It connects you to the ocean, ancient cultures, and spiritual meanings. Some people wear them:

  • As a symbol of protection
  • For fertility or positive energy
  • To feel connected with mother nature or their spiritual side
  1. For Energy & Spiritual Power

Even if you’re not into rituals or meditation, many believe that cowrie shells carry peaceful, grounding energy.

Wearing one close to your heart or on your wrist may help you feel balanced, confident, and protected—especially when you know the meaning behind it.

How I see it

I collect seashells almost every week on the beach near our home. My wife Menaka started making jewelry with them, and now we both enjoy learning more about these small but powerful shells.

Sometimes it’s not just about making something nice to wear. It’s about what that thing means to you.

So whether you wear cowrie shell jewelry for its looks, its history, or its spiritual vibes, remember—you’re wearing something that’s been loved by people for centuries.

That’s all for now, folks! Hope you found something meaningful here. If you have any thoughts or want to share your cowrie jewelry story, feel free to drop a message or tag us on social media. Let’s spread the beauty of cowries.

❤️

Menu

DIY Cowrie Shell Bracelet for Beginners
May 12, 2025

DIY Cowrie Shell Bracelet for Beginners

Let’s Begin with Why Cowrie Shell Bracelets Are Special

Hi, I am Menu again here, and I love to share my experiences with all you guys. I have already published a blog on “Make Your Own Cowrie Shell Necklace at Home.” Hope you guys loved the blog post, and today I am going to share my new blog on DIY cowrie shell bracelets.

Let me answer the question first, “Why are cowrie shell bracelets special?”

Yes, a lot of answers come to our heads, but let me simplify it.

The simple answer is: “It is natural.” People love to blend with nature. We know we are living in a modern world, and we work with artificial intelligence. But people always want to feel like they are a part of nature.

That is why people wear parts of nature like shell jewelry. Especially cowrie shells have a simple, unique, and natural beauty.

Making a cowrie shell bracelet on your own is even more satisfying than just wearing one. I know that is why you are here.

Alright then, let us begin the DIY cowrie shell bracelet guide. I’ll share my personal experiences and the practices I follow, as I have been doing this for a long time as both a hobby and a business.

This guide might be different from others, but trust me you will learn and make your own cowrie shell bracelet with this guide for sure.

Choosing the Style That Suits You

cowrie shell bracelet styles

There are different cowrie shell bracelet styles. You can find them on Pinterest, Etsy, or with a simple Google image search.

What I’m about to share is a simple cowrie shell bracelet with an adjustable design using a sliding knot. This design also does not include any kind of beads in between the shells.

I will be able to share more designs in the future, but as a beginning, let’s go with this one and get the best out of this DIY cowrie shell bracelet guide.

This design is simple and the most common one that you can see everywhere. That is also the reason people love it, it’s simple and made only with cowrie shells.

Since this bracelet is made only with cowrie shells, it feels more natural than other designs.

What are we going to make?

Let me share some beautiful images of the cowrie shell bracelet that we are going to make. This design is simple and easy to make. Also, most people demand this particular design. That is why we consider this item as our top-selling item.

cowrie shell bracelet

Materials You’ll Need

Now let us begin the real thing.

I’ll make a list of what you need with a small description. Some items are easy to find, and some are tricky. If you have your own ways and means for finding the materials, please follow your path too.

5 to 7 cowrie shells (clean and ready)
You need to find good cowrie shells. Good means there are bad ones too. So you need to have the good ones. Consider the following characteristics for a good cowrie shell for a bracelet.

Color – Clean white cowrie shells are good; the color is like milk. There are shells available with some mixed colors and shades. I recommend clean white, and most enthusiasts do too.

But if you prefer a different color, it’s up to you.

Size – Size also matters. Select medium-sized shells not too big or too small.

Shape – You will come across different shapes in cowrie shells. Make sure to select shells with a good shape. I will place an image for reference.

Mini hand drill
We need to drill the cowrie shell to remove the top cover. To do that, we have to drill the shell first and then use the hole to insert a rod and lift the top.

You need to have a hand drill with a 1mm or 2mm drill bit.

Cord or thread (waxed cotton works great)
You can use cotton threads, which we recommend. Also, you can use any color we commonly use black.

Scissors – Not a big deal, just to cut the thread.
Lighter or match (to seal thread ends) – This will be used to seal the cord ends.

Preparing the Shells with Care

Alright, now let’s begin preparing the cowrie shells. Please follow the steps below to prepare cowrie shells for your bracelet.

Select – First, select around 6–7 cowrie shells and consider the color, size, and shape as I mentioned above.

Drill – Next, you need to drill a hole in each cowrie shell you selected using a hand drill. The drill bit size should be 1mm or 2mm. Please see the video below for reference.

Remove top – Now you need to remove the top of the cowrie shell. To do that, insert a rod or round-nose plier into the hole you drilled and lift it. Then you will see the top of the cowrie shell comes off easily.
Follow the same process for the other shells and watch the video tutorial.

Shaping – Now you need to remove any leftover parts after removing the top of the cowrie shell. Use a jewelry plier as shown in the video.

Grind – Once you have removed the unwanted parts, there may still be small rough areas on the cowrie shell. To smooth these out, grind the shell as demonstrated in the video. You can use a grinding shank attached to a mini hand drill for this process.

Clean – The next step is to remove sand and other stuck parts from the shell. Follow the video for better understanding.


Now you have completed preparing the cowrie shells. Let us move on to the step-by-step guide for making the cowrie shell bracelet.

Let’s Make It – Step-by-Step Tutorial

Here we go, now we are going to do the real thing. Make sure to follow the instructions properly.

Measure and cut your cord.

The length depends on the person who will wear the bracelet. I’m an average person, and I will place an image to give an idea of the length I use.

To make it easy, wrap the cord 3 times around your wrist that’s about 45 centimeters.

Making the cowrie shell bracelet

The next steps are really hard to explain in words. So I made a video to show the steps in action.

Please follow the video demonstration. You will need 6–7 cowrie shells for a bracelet, depending on wrist size. Add shells as per your preference.

Make the bracelet adjustable

Take another cord around 10 centimeters long. You need to make a special knot chain to make the cowrie shell bracelet adjustable. It’s a very simple process please follow the video demonstration below to complete this task.

Once you finish, make sure to light the ends and the surface of the knot to tighten it using a lighter.

Now we have finished making the DIY cowrie shell bracelet at home. Hope you enjoyed and are satisfied with the end result.

Caring for Your Bracelet

It’s good to maintain healthy practices when using shell bracelets. Follow these simple tips to make your favorite cowrie shell bracelet last long

  • Keep it dry if you want it to last long.
  • Wipe it gently if it gets dirty.
  • If you’re wearing it outdoors, make sure to clean it after, as sweat may be on the bracelet.
  • Store in a soft pouch to avoid scratches.
  • Avoid soaking in water too often.
  • If the knots are loose, make sure to re-adjust them or seal the ends again using a lighter.

Final Thoughts

So let me finish the DIY cowrie shell bracelet guide, and I hope you got the best out of it. Making shell jewelry is always a self-satisfying thing for me. Not only that, but I make a little living out of this as a homemade business.

I have so many things to share with you guys, so stick with this blog and let’s build a fun shell-crafting community together.

Thanks a lot!

cowrie shell necklace
April 21, 2025

Make Your Own Cowrie Shell Necklace at Home – Easy Guide for Beginners

Cowrie Shell Necklace, Where to start?

Hello guys, I am Menu, actually, it is for Menaka, which is my real name and let us talk about making a Cowrie Shell Necklace at home.

If you are a little confused about where to start, let me show you an easy path.

The first thing that you need to decide is what the purpose of making a Cowrie Shell Necklace at home is.

I will break it down into 3 parts to understand easily:

01. Make necklace for yourself

Making a necklace for yourself is a self-satisfying activity that makes you happy with the end result. You do not need to stress out about the process as you are making it for yourself. Also, the preparation for this is not as hard as making it for a gift or for business. The quality and the time depend on you, so take it easy and follow the instructions.

02. Make it as a gift or for someone else

It’s a little different than above when it comes to making seashell jewelry as a gift or for someone else. You need to make it on time and consider the quality. Also, think about the packing to offer it as a gift. While it’s a little harder than making it for yourself, it is still easy just follow the guide.

03. Make Seashell jewelry for business

Making seashell jewelry for a business is a little tricky process as we need to think about several things before starting. I’ll share some of the facts that you should consider if you are planning to start a home business selling seashell jewelry products.

Materials – You will have to find cowrie shells and maintain a stock, which may depend on the orders that you have. We maintain around 5KG -10KG of cowrie shell stock per month to deliver around 200 – 400 finished items.

Also, you need cotton threads, beads, pearls, chains, jump rings, clasps, eye pins, etc.

Tools – When you make a production, you will need tools like drilling machines, sandpapers, wire cutters, jewelry pliers, and safety items like safety spectacles, face masks, a table, or a working desk.

Production – To have a consistent production process, you will need to have all the required materials.

Time – You have to manage your time if you are planning to do this as a part-time business. From buying materials to delivering the products, it’s a bit of a long process that needs consistency.

Audience – The audience is the group of people that you are targeting to sell the seashell jewelry to. It is better to have an idea of your target audience to design and market your items.

Marketing methods – There are several marketing methods for selling these types of items. We sell our items online, so we have experience with online business. It is good to have an idea from a marketing perspective before starting a business.

Delivery plan – Make sure to have a plan, as delivering is also a major part of the business if you are planning to sell online.

So determining the way that you start is up to you. Consider the facts above. In this guide, you will find guidance for all three paths. Make sure to grab the things that suit your purpose, as I am sharing guidance that covers everything from making a cowrie shell necklace to selling it.

My experience is a different story. My husband Dilip is a surfing enthusiast. And I am the surfing partner, not for surfing, but for holding the surfboard on the bike from home to the beach. Once he gets into the sea, I have around two hours of free time and what I love to do is walk on the beach and collect seashells.

Somehow I got an idea to make cowrie shell jewelry and I found resources on Google and YouTube. To make jewelry using cowrie shells, the shell’s top layer needs to be removed. Luckily, I found cowrie shells that naturally had the top removed on the beach. And one requirement was completed. Then I needed threads and the practice to develop the skill.

I bought some threads from a local store and tied different types of knots to tighten the cowrie shells and finally built a beautiful and satisfying cowrie shell necklace. Remember, I didn’t have any kind of business idea up to now. All I wanted was to try this new thing with my hands, and that’s all.

Now let’s make a cowrie shell necklace at home

Before we begin, let me break down the process into a few steps. Then I will explain one by one, and all you need to do is follow the guide correctly.

1. Finding cowrie shells

Finding a good and enough collection of cowrie shells is a bit challenging, especially if you are planning to do a business. But if it’s just for yourself, it’s not that difficult.

We are living in a coastal area that is only 3 kilometers from our home. So finding seashells on our own is easy.

Also, because of the coastal area, we can find local sellers and buy, and it’s easier than picking seashells on a beach for hours even though it is a stress-relieving activity.

On the other hand, we can find online sellers on Amazon, AliExpress, or any other e-commerce platform to contact and buy seashells online.

What you need to consider when finding cowrie shells

Natural – Make sure to have natural seashells, as there are many synthetic ones available. I personally prefer natural ones, and customers also prefer seashells to be natural.

Size – Size is also a matter. Larger sizes don’t look good for necklaces. It’s good to have medium and small sizes of cowrie shells not too small, either.

Color – Most people prefer clean white cowrie shells, as it is the most popular color. When cowrie shells get old, the color changes from white to a yellowish tone, which makes them look old. Make sure to skip these shells when selecting good-looking white cowrie shells.

Finding other essential accessories

To make a cowrie shell necklace at home, you need more accessories besides seashells. Let me list them below:

  • Cotton threads – Used to tie the cowrie shells and build the necklace. Threads come in different colors and sizes. We recommend using 1mm thread.
  • Beads – You can use any type of beads you prefer, in any color. We use wooden, glass, ceramic, and plastic beads with different colors.
  • Chains – We use chains in different sizes, colors, and designs. This is also up to you select a chain type you like.
  • Jump rings – Used as connectors to connect shells, beads, threads, and other accessories.
  • Jewelry clasp – Used to connect or close two ends of necklaces, bracelets, and anklets.

These are the accessories mostly used for making cowrie shell necklaces. Find good-quality ones for a finished look.

How to find accessories?

I use several methods to find accessories.

First method is going to local stores we already know. We have a few local stores that have most of the accessories we need. We buy at wholesale prices because we buy a lot at once, as we need the accessories continuously for production.

Second method is buying from online marketplaces like Amazon, AliExpress, and even Facebook Marketplace.

We use these two methods, and it’s easy to find as they are always available online and in local stores.

Tools

There are tools that you should have on hand to make cowrie shell necklaces, and most of them are must-haves. Let me list them below.

  • Mini hand drill – You’ll need one with a 1mm or 2mm drill bit. Some come with extras like sanders, grinding shank, cutters, and sandpaper.
  • Jewelry pliers – Important for preparing and finishing the necklace.
  • Round nose pliers – Used for bending and tying accessories.
  • Thread trimmer – Needed for cutting threads.
  • Wire cutters – Needed when using wire threads.
  • Safety spectacles – Good to wear while drilling and breaking shells.
  • Face mask – Dust comes out when drilling and grinding shells, so it’s better to wear a mask.

2. Preparing cowrie shells

“Preparing” means getting cowrie shells ready after selecting ones in good shape and size.

First, take the shell and drill a hole. See the video and image below for positioning. Use a 2mm drill bit. Wear a face mask and protective spectacles.

Next, remove the top of the shell. To do that, insert a rod into the drilled hole and lift the top. See video below. We use a Round Nose Plier for this.

Now you can see the cowrie shell with the top removed

Next, clean and shape the shell by removing any unnecessary parts left behind.

Then use a grinding shank to smooth and shape the shell nicely.

Remove any stuck sand grains in the shell as shown here.

https://www.youtube.com/shorts/b0kMRhl2tuc?feature=share

You will need around 10–15 cowrie shells to make a necklace, but the count may vary depending on the necklace length.

3. Start making the necklace

This is the little tricky part, and most of the steps for tying are shown through short videos below. Watch carefully and don’t skip.

  • First, cut the correct thread length. See the image below for an idea. Thread length depends on the person we used the length in the image for an adult.

Next, tie the cowrie shells with the thread. Follow the video tutorial closely to learn the pattern used.

Final step is making the necklace adjustable with a final knot. Follow the tutorial video for this as well.

Alright then, that is all for this tutorial. Hope you found some important details on making a cowrie shell necklace at home. Also see our DIY cowrie shell bracelet at home and Please share this with your friends and show some love ❤️

Search for products (0)

Back to Top
Product has been added to your cart
Compare (0)