
Let’s Begin with Why Cowrie Shell Bracelets Are Special
Hi, I am Menu again here, and I love to share my experiences with all you guys. I have already published a blog on “Make Your Own Cowrie Shell Necklace at Home.” Hope you guys loved the blog post, and today I am going to share my new blog on DIY cowrie shell bracelets.
Let me answer the question first, “Why are cowrie shell bracelets special?”
Yes, a lot of answers come to our heads, but let me simplify it.
The simple answer is: “It is natural.” People love to blend with nature. We know we are living in a modern world, and we work with artificial intelligence. But people always want to feel like they are a part of nature.
That is why people wear parts of nature like shell jewelry. Especially cowrie shells have a simple, unique, and natural beauty.
Making a cowrie shell bracelet on your own is even more satisfying than just wearing one. I know that is why you are here.
Alright then, let us begin the DIY cowrie shell bracelet guide. I’ll share my personal experiences and the practices I follow, as I have been doing this for a long time as both a hobby and a business.
This guide might be different from others, but trust me you will learn and make your own cowrie shell bracelet with this guide for sure.
Choosing the Style That Suits You
There are different cowrie shell bracelet styles. You can find them on Pinterest, Etsy, or with a simple Google image search.
What I’m about to share is a simple cowrie shell bracelet with an adjustable design using a sliding knot. This design also does not include any kind of beads in between the shells.
I will be able to share more designs in the future, but as a beginning, let’s go with this one and get the best out of this DIY cowrie shell bracelet guide.
This design is simple and the most common one that you can see everywhere. That is also the reason people love it, it’s simple and made only with cowrie shells.
Since this bracelet is made only with cowrie shells, it feels more natural than other designs.
What are we going to make?
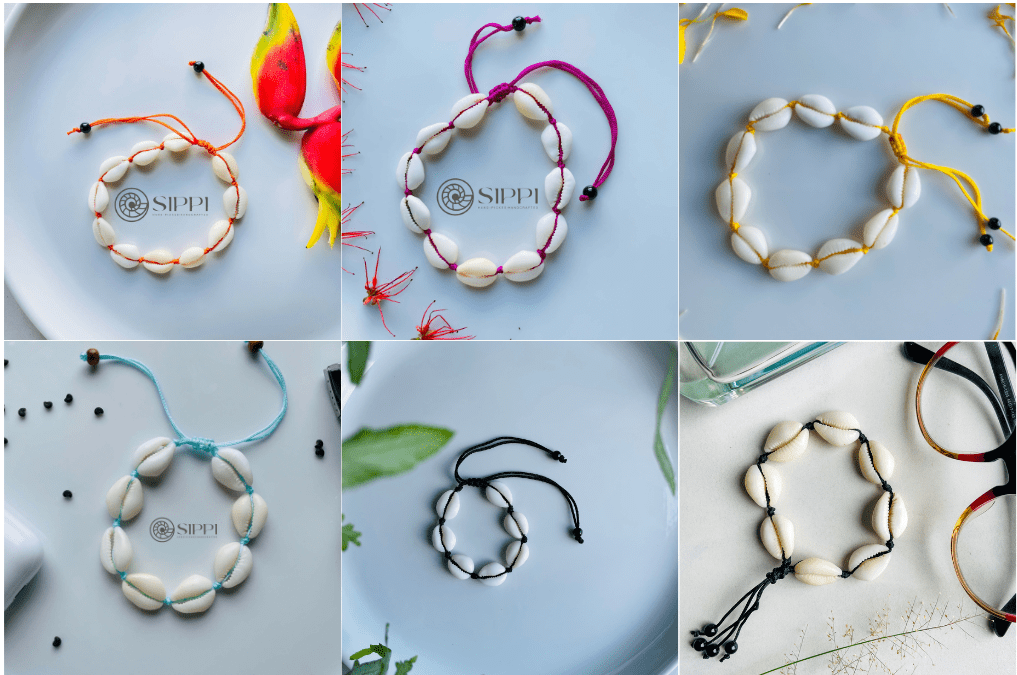
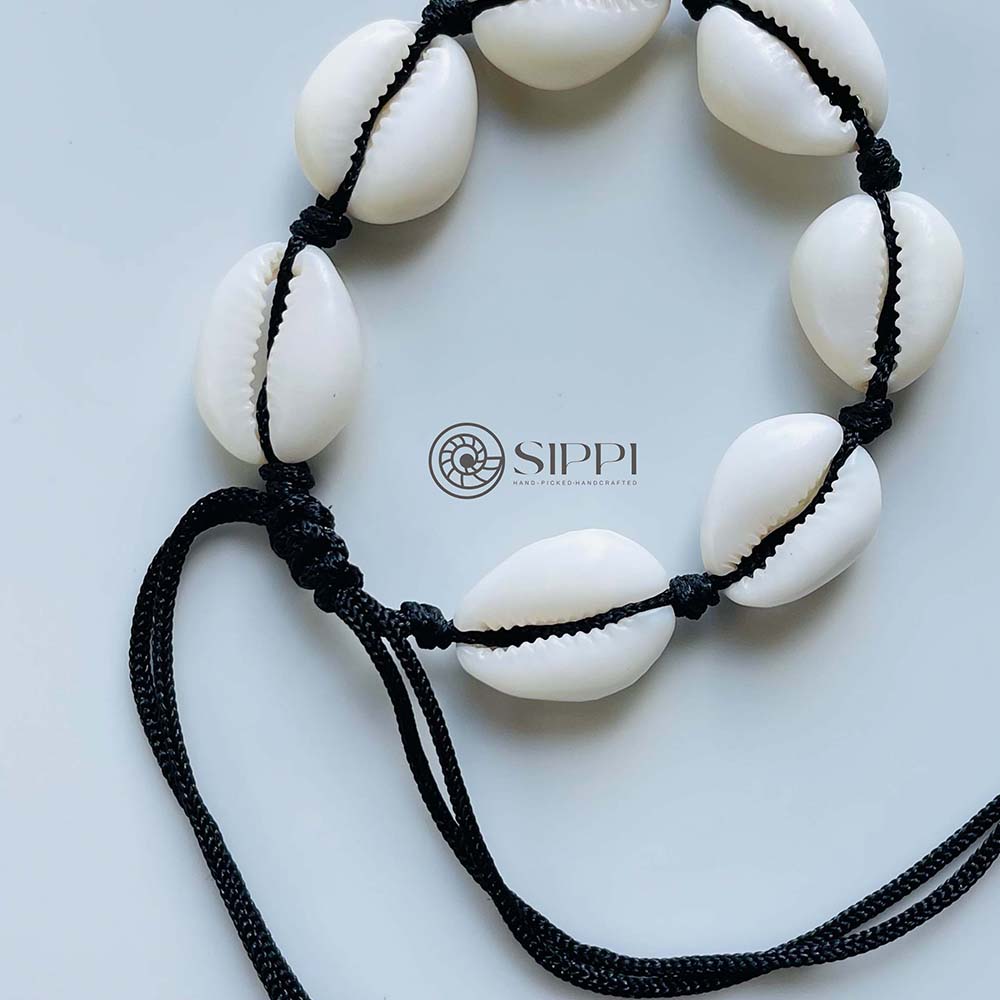
Let me share some beautiful images of the cowrie shell bracelet that we are going to make. This design is simple and easy to make. Also, most people demand this particular design. That is why we consider this item as our top-selling item.
Materials You’ll Need
Now let us begin the real thing.
I’ll make a list of what you need with a small description. Some items are easy to find, and some are tricky. If you have your own ways and means for finding the materials, please follow your path too.
5 to 7 cowrie shells (clean and ready)
You need to find good cowrie shells. Good means there are bad ones too. So you need to have the good ones. Consider the following characteristics for a good cowrie shell for a bracelet.
Color – Clean white cowrie shells are good; the color is like milk. There are shells available with some mixed colors and shades. I recommend clean white, and most enthusiasts do too.
But if you prefer a different color, it’s up to you.
Size – Size also matters. Select medium-sized shells not too big or too small.
Shape – You will come across different shapes in cowrie shells. Make sure to select shells with a good shape. I will place an image for reference.
Mini hand drill
We need to drill the cowrie shell to remove the top cover. To do that, we have to drill the shell first and then use the hole to insert a rod and lift the top.
You need to have a hand drill with a 1mm or 2mm drill bit.
Cord or thread (waxed cotton works great)
You can use cotton threads, which we recommend. Also, you can use any color we commonly use black.
Scissors – Not a big deal, just to cut the thread.
Lighter or match (to seal thread ends) – This will be used to seal the cord ends.
Preparing the Shells with Care
Alright, now let’s begin preparing the cowrie shells. Please follow the steps below to prepare cowrie shells for your bracelet.
Select – First, select around 6–7 cowrie shells and consider the color, size, and shape as I mentioned above.
Drill – Next, you need to drill a hole in each cowrie shell you selected using a hand drill. The drill bit size should be 1mm or 2mm. Please see the video below for reference.
Remove top – Now you need to remove the top of the cowrie shell. To do that, insert a rod or round-nose plier into the hole you drilled and lift it. Then you will see the top of the cowrie shell comes off easily.
Follow the same process for the other shells and watch the video tutorial.
Shaping – Now you need to remove any leftover parts after removing the top of the cowrie shell. Use a jewelry plier as shown in the video.
Grind – Once you have removed the unwanted parts, there may still be small rough areas on the cowrie shell. To smooth these out, grind the shell as demonstrated in the video. You can use a grinding shank attached to a mini hand drill for this process.
Clean – The next step is to remove sand and other stuck parts from the shell. Follow the video for better understanding.
Now you have completed preparing the cowrie shells. Let us move on to the step-by-step guide for making the cowrie shell bracelet.
Let’s Make It – Step-by-Step Tutorial
Here we go, now we are going to do the real thing. Make sure to follow the instructions properly.
Measure and cut your cord.
The length depends on the person who will wear the bracelet. I’m an average person, and I will place an image to give an idea of the length I use.
To make it easy, wrap the cord 3 times around your wrist that’s about 45 centimeters.
Making the cowrie shell bracelet
The next steps are really hard to explain in words. So I made a video to show the steps in action.
Please follow the video demonstration. You will need 6–7 cowrie shells for a bracelet, depending on wrist size. Add shells as per your preference.
Make the bracelet adjustable
Take another cord around 10 centimeters long. You need to make a special knot chain to make the cowrie shell bracelet adjustable. It’s a very simple process please follow the video demonstration below to complete this task.
Once you finish, make sure to light the ends and the surface of the knot to tighten it using a lighter.
Now we have finished making the DIY cowrie shell bracelet at home. Hope you enjoyed and are satisfied with the end result.
Caring for Your Bracelet
It’s good to maintain healthy practices when using shell bracelets. Follow these simple tips to make your favorite cowrie shell bracelet last long
- Keep it dry if you want it to last long.
- Wipe it gently if it gets dirty.
- If you’re wearing it outdoors, make sure to clean it after, as sweat may be on the bracelet.
- Store in a soft pouch to avoid scratches.
- Avoid soaking in water too often.
- If the knots are loose, make sure to re-adjust them or seal the ends again using a lighter.
Final Thoughts
So let me finish the DIY cowrie shell bracelet guide, and I hope you got the best out of it. Making shell jewelry is always a self-satisfying thing for me. Not only that, but I make a little living out of this as a homemade business.
I have so many things to share with you guys, so stick with this blog and let’s build a fun shell-crafting community together.
Thanks a lot!